Basic Information
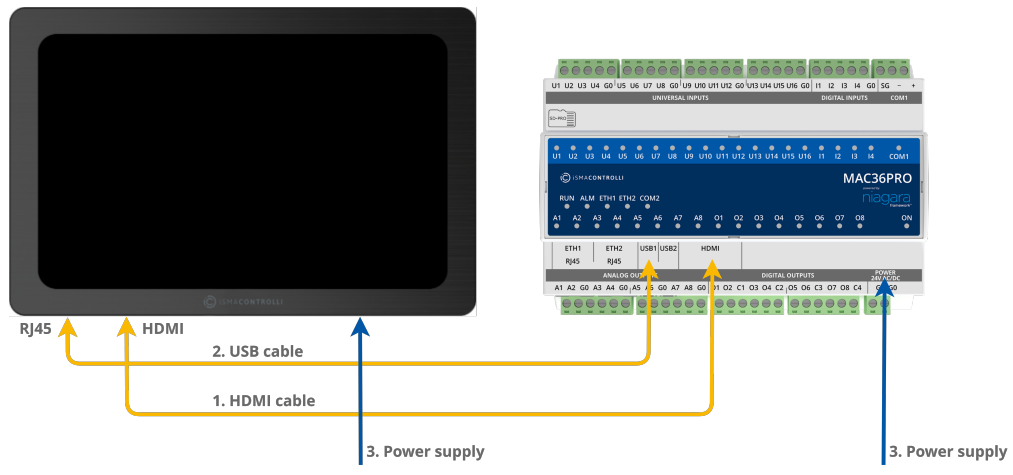
The iSMA-B-MAC36PRO and iSMA-B-MAC36NL controllers have a built-in HDMI port. This allows you to connect an external display using a standard HDMI cable and view your station data directly on the display, without needing a PC with a web browser.
However, it’s recommended to use HMI panels from iSMA CONTROLLI. Using other panels may result in issues with resolution, touch, or overall operation. iSMA CONTROLLI isn’t responsible for any issues arising from using non-recommended HMI panels with MAC36 controllers.
Keep in mind that using HMI views via HDMI requires launching the web browser in the Niagara 4 environment on the MAC36 controllers. This will significantly increase CPU usage and result in higher operating temperatures.
Note: MAC36 controllers have a built-in USB port, which supports a display’s touchpad
Configuration
- Connect the USB and HDMI cables to the iSMA-B-MAC36NL/PRO controller, derived from the HMI panel with the HDMI interface.
- Power the panel and then the controller.
- After MAC36 starts, log in to the platform, go to the Software Manager and install the iSMA_HDMI-rt module.
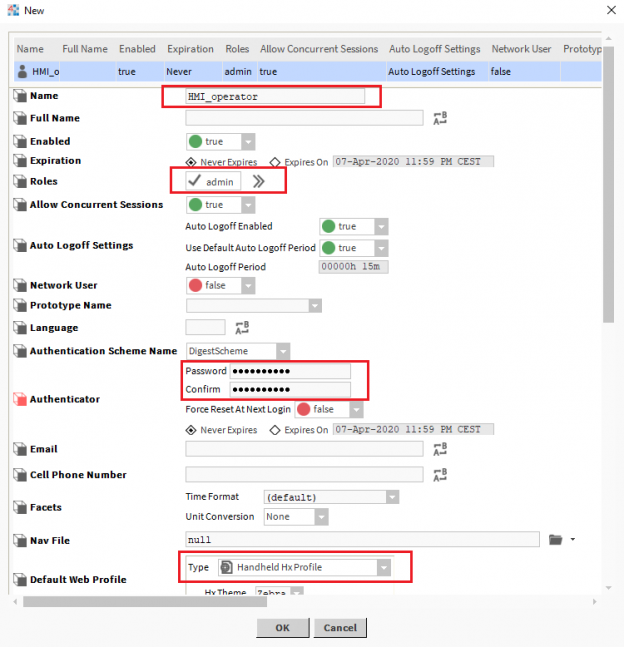
- After the correct installation, log in to the station, go to the Config > Services > UserService location, and add the user to use the HMI panel. First of all, set the name, assign the appropriate role, give it a password and change the Default Web Profile to Handheld Hx Profile.
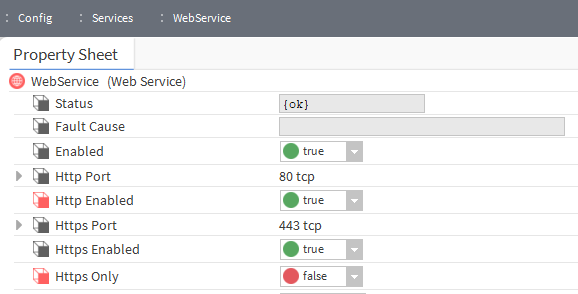
- The next step is to launch port 80 (HTTP) becasue web browser works only with HTTP. To do this, go to the Config > Services > WebService location and change the Http Enabled slot values to true and Https Only to false and save the settings with the Save button.
- In the next step, in the Config > Services location, add (by “Drag & Drop”) the iSMAHDMI component from the iSMA_HDMI palette, and then open it’s AX Property Sheet view.
- In this view, change the value of the Auto Login slot to true and in the Auto Login Credentials slot, enter the login data of the user intended to operate the HMI panel.
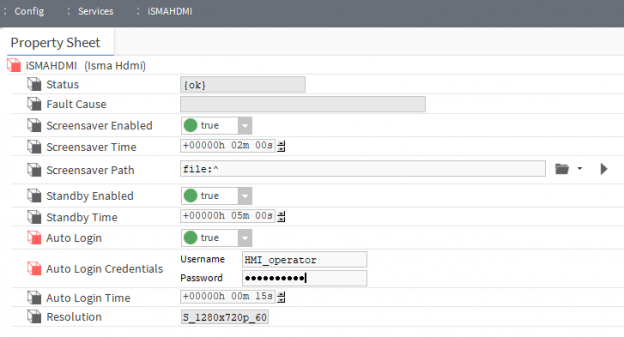
- You can adjust other slots such as Auto Login Time – to log in faster, or choose your custom screensaver image. Below is the default one

- After saving the settings, the HMI panel with HDMI interface will automatically log in using the entered auto-loign user data and open the default (for the user) view.
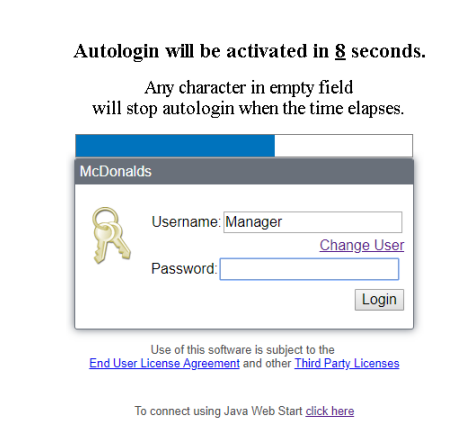
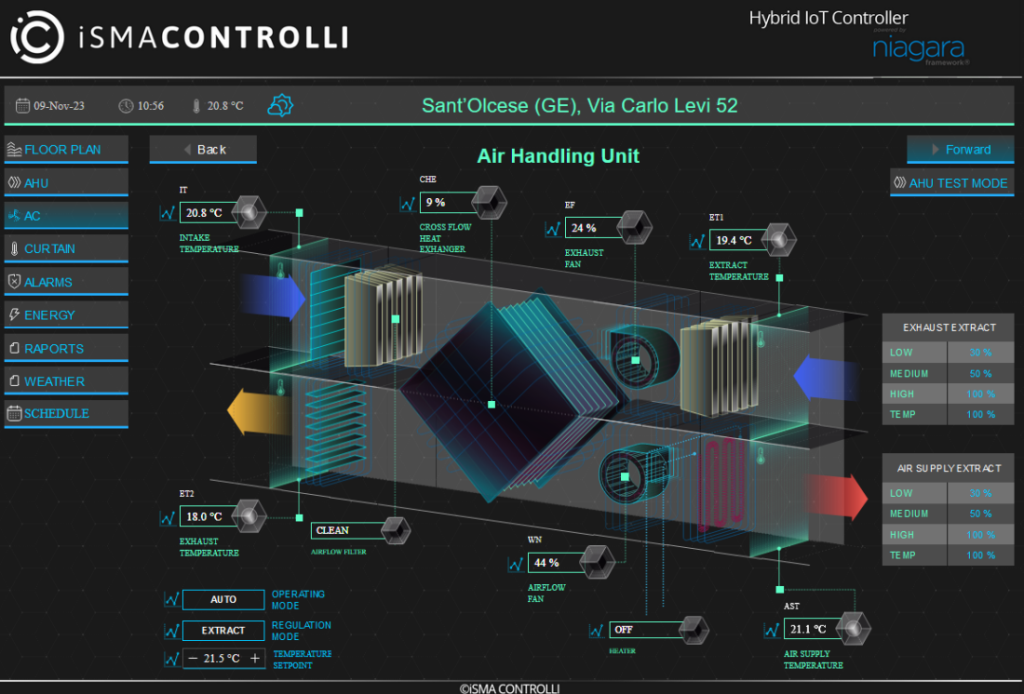
- It’s worth creating a navigation file and applying it to the HMI user so that the specific home page is displayed (following is the sample view)